My 12 year old niece came over the other day and I was looking for a craft we could all do together. The ages ranged from 4 to 12 and both boys and girls….
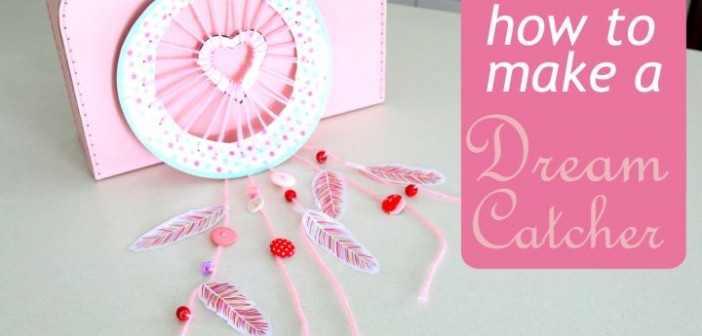
We found this simple dream catcher to make. Of course, you can go as simple or as elaborate as you like and hang them in their bedrooms at the end.
So What is a Dream Catcher?
The legend goes…that a dream catcher will protect someone sleeping from negative dreams, while letting positive dreams slip through the centre and glide down the feathers to the person sleeping below. The negative dreams will get caught up in the web.
Let’s make one! You will need:
- a paper plate
- some wool (as many colours as you like)
- pencil
- scissors
- hole punch
- feathers & beads
Attached is a Feather Template if you would like to print and design your own feathers.
Step 1
Cut around your paper plate to form a ring. Try and cut it so you have a “whole” circle left at the end.
Step 2
Trace a heart onto the piece of plate you have just cut out and then draw another heart inside it.
(I used cookie cutters to make it easier but freehand would be just as good!) Cut out the heart.
Step 3
With your hole punch start putting holes around the ring of your paper plate. I basically followed the spacing of a clock. Start at the top and then the bottom and then work your way around evenly spacing the holes.
Step 4
Begin threading your wool through the hole punched holes and then through the middle of the heart. Then back through the hole punches and back through the heart, over and over until you reach the end.
(Tip: wrap a tiny piece of sticky tape around the end of your wool – this will make it like the tip of a shoelace and will be easier to thread through.)
Step 5
Once you have threaded all the way around leave the tails of the wool hanging down – this is where you will add any decorations.
We decided to have 5 strands of wool hanging down so just simply tied 3 more pieces of wool to the back.
Step 6
Now the fun part of decorating begins. Be creative and add feathers, beads, buttons, stickers…whatever you like to bling your dream catcher.
Step 7
Tie a piece of wool to the top and hang it in their room.
Sweet Dreams!


